How to Clean Kitchen Cabinets: Step-by-Step
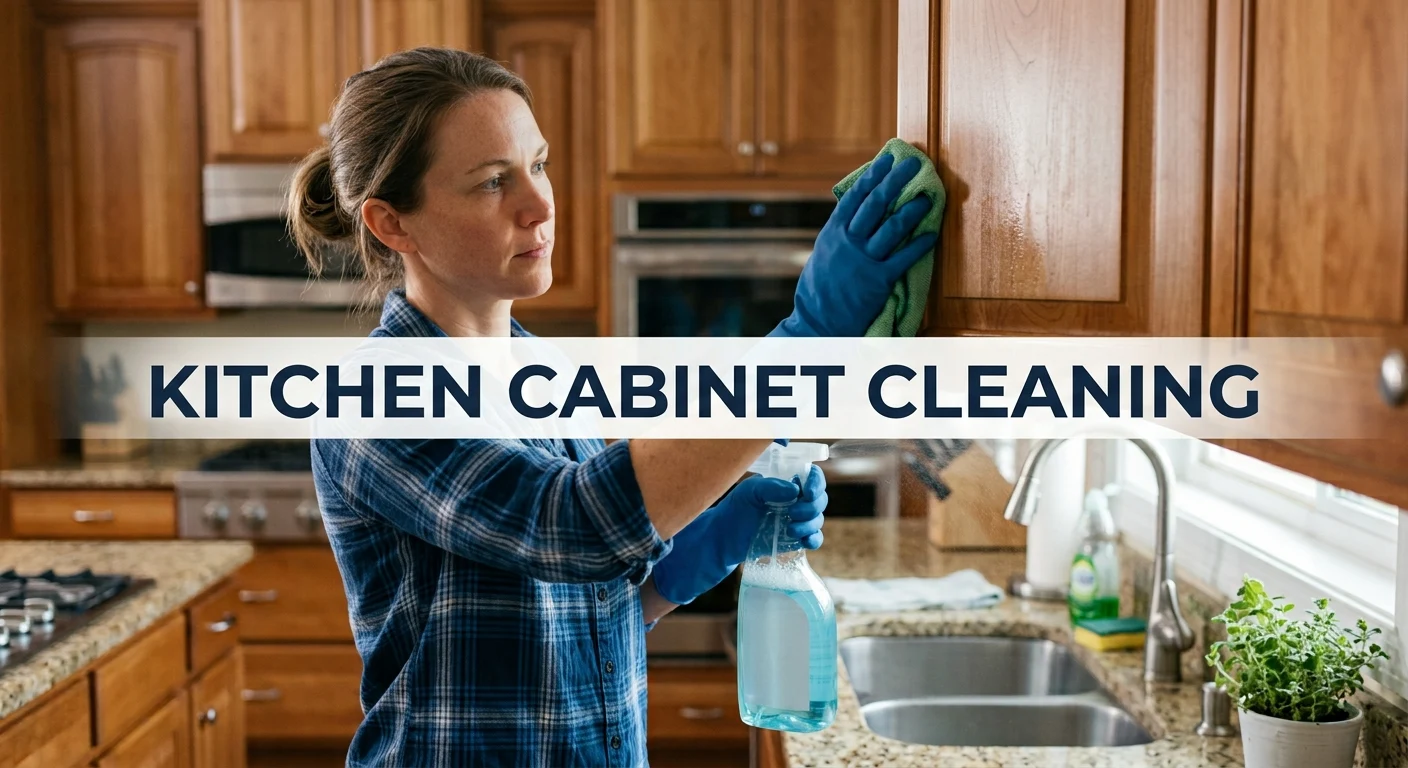
Kitchen cabinets can collect a thin layer of cooking grease within just a few weeks of regular cooking. You may not always see this buildup, but over time it can attract dust and make your cabinets look dull or sticky. That is why it is important to know how to clean kitchen cabinets properly. Using the wrong cleaning method can leave streaks, damage the surface, or affect the finish.
This guide will show you how to clean kitchen cabinets safely and effectively, whether they are made of wood, painted, laminate, or have a matte finish. Using the right cleaning method can help protect your cabinets and keep them looking clean and fresh for longer.
In this guide, you’ll learn:
- The safest cleaning solutions for every cabinet material
- A step-by-step process to remove tough grease buildup
- Tools professional cleaners actually use
- Mistakes that damage cabinet finishes permanently
- How often you should deep clean vs. do quick wipe-downs
- A comparison of natural vs. store-bought cleaning methods
Let’s walk through the full process, starting with what “clean” actually means for your cabinets.
What Is Kitchen Cabinet Cleaning?
Kitchen cabinet cleaning is defined as the process of removing grease, dust, food splatter, and surface grime from cabinet exteriors and interiors without damaging the underlying wood, paint, or laminate finish. It differs from general kitchen cleaning because cabinets sit closest to heat sources and absorb airborne cooking oils faster than any other surface in the room.
There are two levels worth knowing:
- Quick cleaning : A light wipe with a damp microfiber cloth to remove dust and fingerprints done weekly.
- Deep cleaning : A full grease cutting treatment using a degreasing solution done every 1 to 3 months depending on cooking frequency.
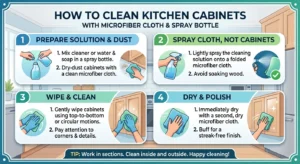
Understanding how to clean kitchen cabinets properly starts with knowing your cabinet material because wood, laminate, and painted MDF each react differently to moisture and chemicals.
Why Cleaning Kitchen Cabinets Matters in 2026
Modern kitchens often use cooking methods that involve high heat such as air frying, stir frying, and cooking on induction stovetops. These methods can release tiny oil particles into the air which may eventually settle on nearby surfaces including your kitchen cabinets.
Over time, this thin layer of grease can attract dust and dirt. The longer it remains on your cabinets the more difficult it can become to remove. Old grease may harden and leave your cabinets looking dull, sticky, or dirty.
Keeping your kitchen cabinets clean can also make a big difference to the overall appearance of your kitchen. Dirty or sticky cabinets can make an otherwise clean kitchen look neglected, especially when you are preparing your home for guests or a potential sale. Regular cleaning helps keep your cabinets looking fresh and makes heavy grease buildup easier to prevent.
Quotable insight: Clean cabinets aren’t just about hygiene — they’re the single fastest visual signal of how well-maintained an entire kitchen is.
How to Clean Greasy Kitchen Cabinets: Step-by-Step
How do you clean greasy kitchen cabinets without damaging the finish? The safest method combines a mild degreasing solution, a soft cloth, and gentle circular motion. Remember never do harsh scrubbing on the surface of cabinets. Here’s the full process cleaning professionals follow.
The 5-Step Cabinet Clean System:
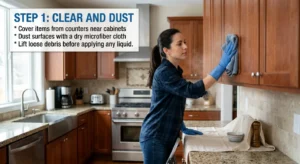
Step 1: Clear and Dust
Cover items from counters near cabinets and dust surfaces with a dry microfiber cloth to lift loose debris before applying any liquid.
Step 2: Mix Your Solution
Combine warm water with a few drops of dish soap, or equal parts water and white vinegar for tougher grease. Avoid ammonia-based cleaners on wood.

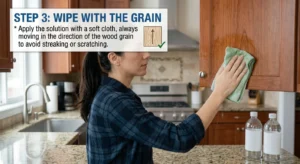
Step 3: Wipe With the Grain
Apply the solution with a soft cloth, always moving in the direction of the wood grain to avoid streaking or scratching.
Step 4: Target Grease Zones
Focus extra time on cabinets nearest the stove and handles, where grease and hand oils concentrate most.

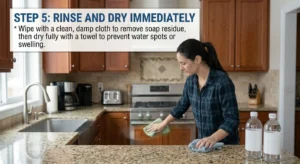
Step 5: Rinse and Dry Immediately
Wipe with a clean, damp cloth to remove soap residue, then dry fully with a towel to prevent water spots or swelling.
Pro Tip : Never let water sit on wood cabinets for more than a minute. Standing moisture is the number one cause of swollen doors and peeling veneer, according to cabinet refinishing professionals.
This process works whether you’re focused on how to clean greasy kitchen cabinets around the stove or general everyday grime across the whole kitchen.
Best Tools and Strategies for Wood Cabinets
What is the best way to clean wood kitchen cabinets? Use a pH-neutral cleaner, a microfiber cloth, and a soft bristle brush for grooves and never abrasive sponges or steel wool which scratch the finish permanently.
Here’s what belongs in a proper cabinet cleaning toolkit:
- Microfiber cloths (lint-free, non-scratching)
- Soft-bristle detail brush for carved grooves and hardware
- pH-neutral dish soap or a vinegar-water mix
- Baking soda paste for stuck-on grease spots
- Wood conditioner or mineral oil for natural wood finishes
- Rubber gloves for extended cleaning sessions
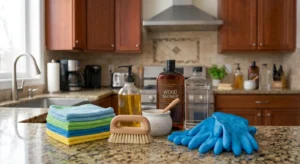
How to clean wood kitchen cabinets without damaging them comes down to one rule: match the cleaner to the finish. Sealed, varnished wood tolerates a light vinegar solution. Unsealed or oiled wood should only ever be cleaned with a barely damp cloth followed immediately by drying.
Real-World Example
One homeowner in Ohio allowed grease from everyday cooking to build up on unfinished oak cabinets for three years. After giving the cabinets a thorough clean with warm water and dish soap, they applied a beeswax conditioner to restore the wood’s natural appearance. The difference was noticeable within an afternoon. Once the layer of built up grease was removed, the cabinets looked lighter, smoother, and more refreshed. Best of all, there was no need for sanding or refinishing.
Common Cabinet Cleaning Mistakes to Avoid
Even careful homeowners damage their cabinets by using the wrong products. Here are the mistakes that show up most often:
- Using abrasive scrubbers — Steel wool and rough sponges strip finish and create micro-scratches that trap more grime later.
- Skipping the drying step — Leftover moisture warps wood and causes peeling veneer over time.
- Spraying cleaner directly onto cabinets — This pools liquid into seams and hinges. Always spray onto the cloth instead.
- Using bleach or ammonia on wood — These strip natural oils and can discolor stained finishes.
- Ignoring cabinet hardware — Handles and knobs collect the most bacteria in the kitchen and are often skipped entirely.
- Cleaning too infrequently — Waiting months between cleanings lets grease harden, requiring much stronger chemicals later.
Pro Tip: The biggest mistake isn’t using the wrong cleaner but waiting too long between cleanings, which turns a two minute wipe down into a scrub heavy chore.
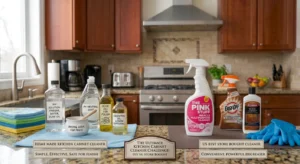
Natural vs. Store-Bought Cleaning Methods
Is a natural method or a store bought degreaser the best way to clean kitchen cabinets? It depends on grease level and cabinet material.natural methods are gentler for daily use, while store-bought degreasers work faster on heavy, hardened buildup.
Natural vs. Store-Bought Cleaning Comparison
| Method | Key Feature | Best For | Cost | Rating |
|---|---|---|---|---|
| Vinegar + Water | Gentle acid cuts light grease | Weekly maintenance | Under $2 | 4/5 |
| Baking Soda Paste | Mild abrasive for stuck spots | Painted cabinets | Under $3 | 4/5 |
| Dish Soap Solution | All-purpose, safe on most finishes | Everyday cleaning | Under $3 | 5/5 |
| Commercial Degreaser | Strong grease-cutting agents | Heavy stovetop grease | $5–$10 | 4/5 |
| Professional Cleaning Service | Deep clean + finish restoration | Move-in/move-out or neglected kitchens | $80–$200 | 5/5 |
Winner: For most households, a dish soap solution wins for everyday use because it’s gentle, affordable, and safe across nearly every cabinet material. Save commercial degreasers or professional service for stubborn, months-old buildup.
Expert Tips to Master Cabinet Cleaning
How to clean kitchen cabinets safely comes down to consistency and the right technique — not harsh chemicals. These expert-level habits keep cabinets looking new for years.
- Wipe cabinets near the stove weekly; wipe the rest monthly
- Test any new cleaner on an inside corner before full use
- Use a toothbrush for grooves, hinges, and handle bases
- Apply wood conditioner every 6 months on natural wood finishes
- Keep a dedicated cabinet-cleaning cloth separate from countertop cloths
- Address spills and splatters the same day, not the same week
Daily vs. Weekly Cleaning: What’s the Real Difference?
Daily kitchen cabinet cleaning is a light wipe to catch fresh splatter before it dries into a film. Weekly cleaning is a fuller wipe-down with a mild solution across all cabinet fronts. Skipping straight to monthly deep cleans is what lets grease harden into a stubborn coating that takes far more effort to remove.
Quick Clean vs. Deep Clean: Which Do You Need?
A quick clean uses just water and a microfiber cloth for light dust. A deep clean uses a degreasing solution, a detail brush for grooves, and a conditioning step afterward. If it’s been more than three months since your last full clean, you need the deep version.
FAQ: How to Clean Kitchen Cabinets
How to deep clean kitchen cabinets?
Deep cleaning kitchen cabinets means combining a degreasing solution with detailed attention to grooves, hinges, and handles, followed by rinsing and drying. Start with a warm water and dish soap mix, scrub gently with a soft brush, then dry immediately. Repeat this every 1 to 3 months depending on how often you cook.
How to clean greasy kitchen cabinets without damaging the finish?
Use a soft cloth with a mild dish soap or vinegar-water solution, always wiping with the wood grain, then dry right away. Avoid abrasive sponges and harsh chemical degreasers on finished wood, since they strip the protective coating and cause dullness or scratching over time.
What is the best way to clean kitchen cabinets?
The best way to clean kitchen cabinets is a mild dish soap and warm water solution applied with a microfiber cloth, followed by immediate drying. This method is gentle enough for daily use yet effective enough to prevent grease buildup on most cabinet materials.
How to clean wood kitchen cabinets without damaging them?
Use a barely damp cloth with a pH-neutral cleaner, wipe with the grain, and dry immediately to prevent moisture damage. Follow up periodically with a wood conditioner to keep the finish from drying out or cracking.
Why does kitchen cabinet cleaning matter?
Regular cabinet cleaning prevents grease from hardening into a film that’s difficult to remove and that attracts dust and bacteria. It also protects the finish, extends the cabinet’s lifespan, and keeps the kitchen looking well-maintained.
Is deep cleaning kitchen cabinets worth it?
Yes, deep cleaning is worth it because it removes hardened grease that daily wiping can’t touch and prevents long-term finish damage. Skipping it typically means eventually needing sanding or refinishing, which costs significantly more than routine deep cleaning.
What are the best homemade greasy cabinet removers?
The best homemade grease removers are a vinegar-water mix for light grease and a baking soda paste for stubborn spots. Both are safe on most finishes, inexpensive, and effective without the harsh fumes of commercial degreasers.
How much does it cost to deep clean kitchen cabinets professionally?
Professional kitchen cabinet deep cleaning typically costs between $80 and $200, depending on kitchen size and grease severity. DIY deep cleaning costs under $10 in supplies but requires roughly one to two hours of hands-on time.
What is the difference between deep cleaning and regular cleaning of kitchen cabinets?
Regular cleaning is a light wipe-down to remove dust and light residue, done weekly. Deep cleaning involves a degreasing solution, detail brushing of grooves and hardware, and a conditioning step, done every few months to prevent buildup from hardening.
Conclusion
Knowing how to clean kitchen cabinets properly protects your investment and keeps your kitchen looking fresh year-round. The three biggest takeaways: match your cleaning solution to your cabinet material, always dry surfaces immediately after cleaning, and don’t wait months between cleanings or grease will harden into a much tougher job.
Next Steps:
- Gather a microfiber cloth, mild dish soap, and a soft brush this week
- Do a full deep clean using the 5-Step Cabinet Clean System above
- Set a recurring reminder for a quick wipe-down every week
Author Bio
Written by Sarah Mitchell, a certified residential cleaning specialist with 10 years of hands-on experience in home cleaning and kitchen sanitation. Sarah has trained cleaning teams for two regional cleaning companies and has been consulted on kitchen hygiene practices for local home-improvement publications. She has expertise in cleaning and maintaining wood, painted, laminate, and other kitchen cabinet surfaces. This article is based on practical experience, research, and safe cleaning methods.
Sources & Methodology
This guide was compiled using practitioner experience, general cabinet care guidance from cleaning industry professionals, and manufacturer care instructions for wood, laminate, and painted cabinet finishes.
We also referred to guidance from the Environmental Protection Agency on identifying greener cleaning products and the EPA Safer Choice product search. These resources can help homeowners make more informed decisions when choosing store bought cleaning products and degreasers.
Readers with heavily damaged, delicate, or antique cabinets should consult a professional refinisher before applying any cleaning solution.